Enforce inspects Network traffic to determine which packets to block and allow. Policies attached to Networks determine the internet services allowed into your network, as well as those services your local users can access outside the network.
One or more network rules comprise a configured Network in threatER and each network is identified as a device, asset, or subnet on your network. If the Enforcer receives traffic for the configured Protected IP, then it will allow traffic according to the policy associated with the Network. Each Network configuration includes a protocol and port, or range of ports, so that you may restrict specific policy activity to as granular a level as required.
An Enforcer must have a Enforce build greater than 180 installed to fully take advantage of this feature within the portal. As such, we strongly urge customers to update to the latest software to be able to use these powerful centralized control features. Customers who have not yet updated are not able to control these features centrally, and instead must leverage the legacy Enforce UI elements.
Creating Networks
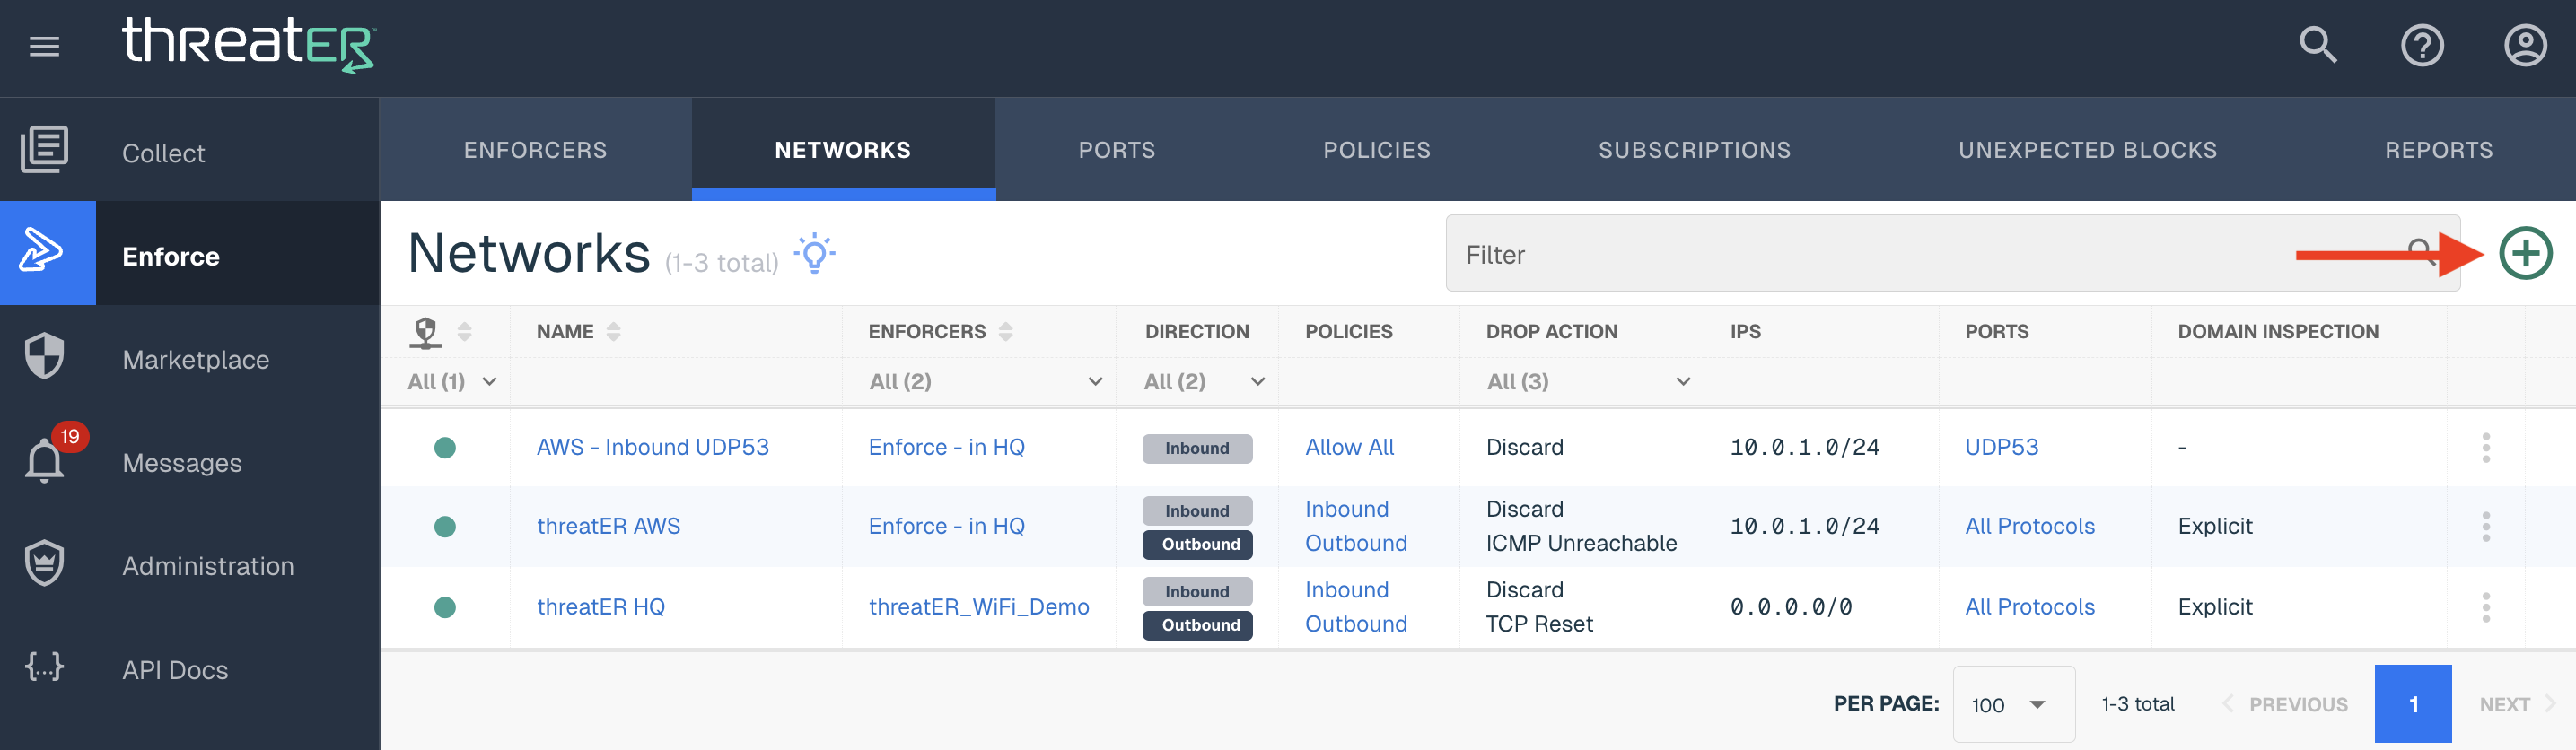
To create a Network, navigate to Enforce > Networks in the left-hand navigation menu. Select the green ⊕ icon in the top-right corner.
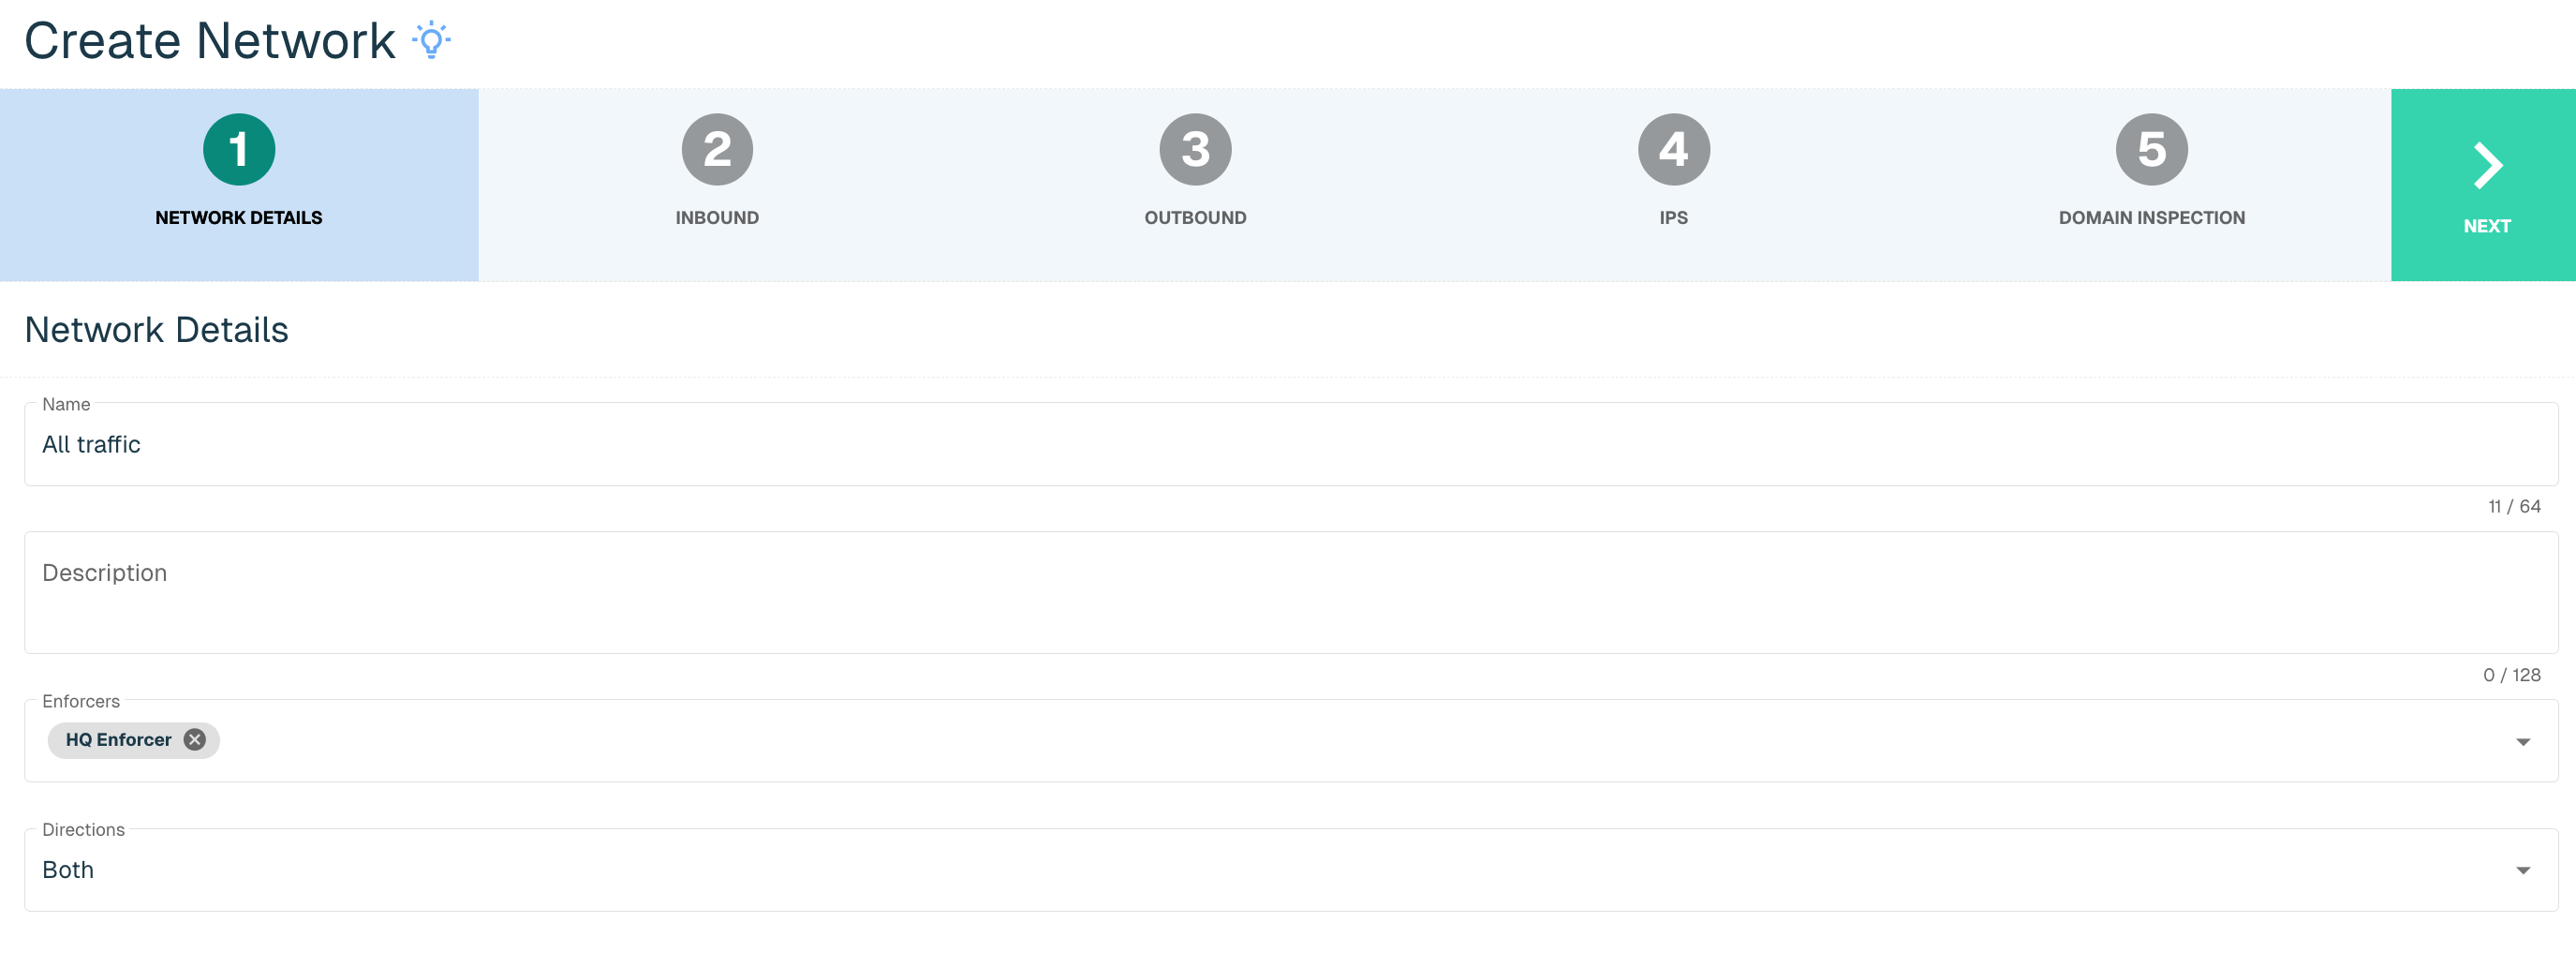
Network Details
Provide the following (* indicates required field):
|
Field Name |
Description |
|
Name* |
Unique name required |
|
Description |
Enter an optional description |
|
Enforcers |
Select the desired Enforcer(s) drop-down. Enforcers on Enforcers Build 154 or prior build will not display in this drop-down. |
|
Directions* |
Options include Inbound, Outbound or Both. Inbound determines the kind of internet traffic allowed into your network with each inbound rule showing a particular computer and service that will be visible to the internet. Outbound determines how your local computers can access the internet. Each outbound rule shows which particular outside internet service a computer can access. |
Once all required fields are complete, select the Next button to proceed to the next step.
Inbound / Outbound
Provide the following for the Direction(s) selected in the previous step (* indicates required field):
|
Field Name |
Description |
|
Policy* |
Name of Policy associated with the Network |
|
Drop Action* |
Options include Discard, ICMP Unreachable, TCP Reset. The Discard option drops the packet and does not send any response (silently discards it). This is useful especially for inbound attempts, so that malicious attackers are not necessarily able to determine your presence. The ICMP Unreachable drops the packet and sends an ICMP unreachable packet to the sender. This is generally recommended only for use with outbound policies. The TCP Reset drops the packet and sends a TCP Reset packet back to the sender. Recommended only if the firewall doesn't properly allow ICMP Unreachable messages. Additionally, this is generally recommended only for use with outbound policies. |
Select Next to proceed to the next step.
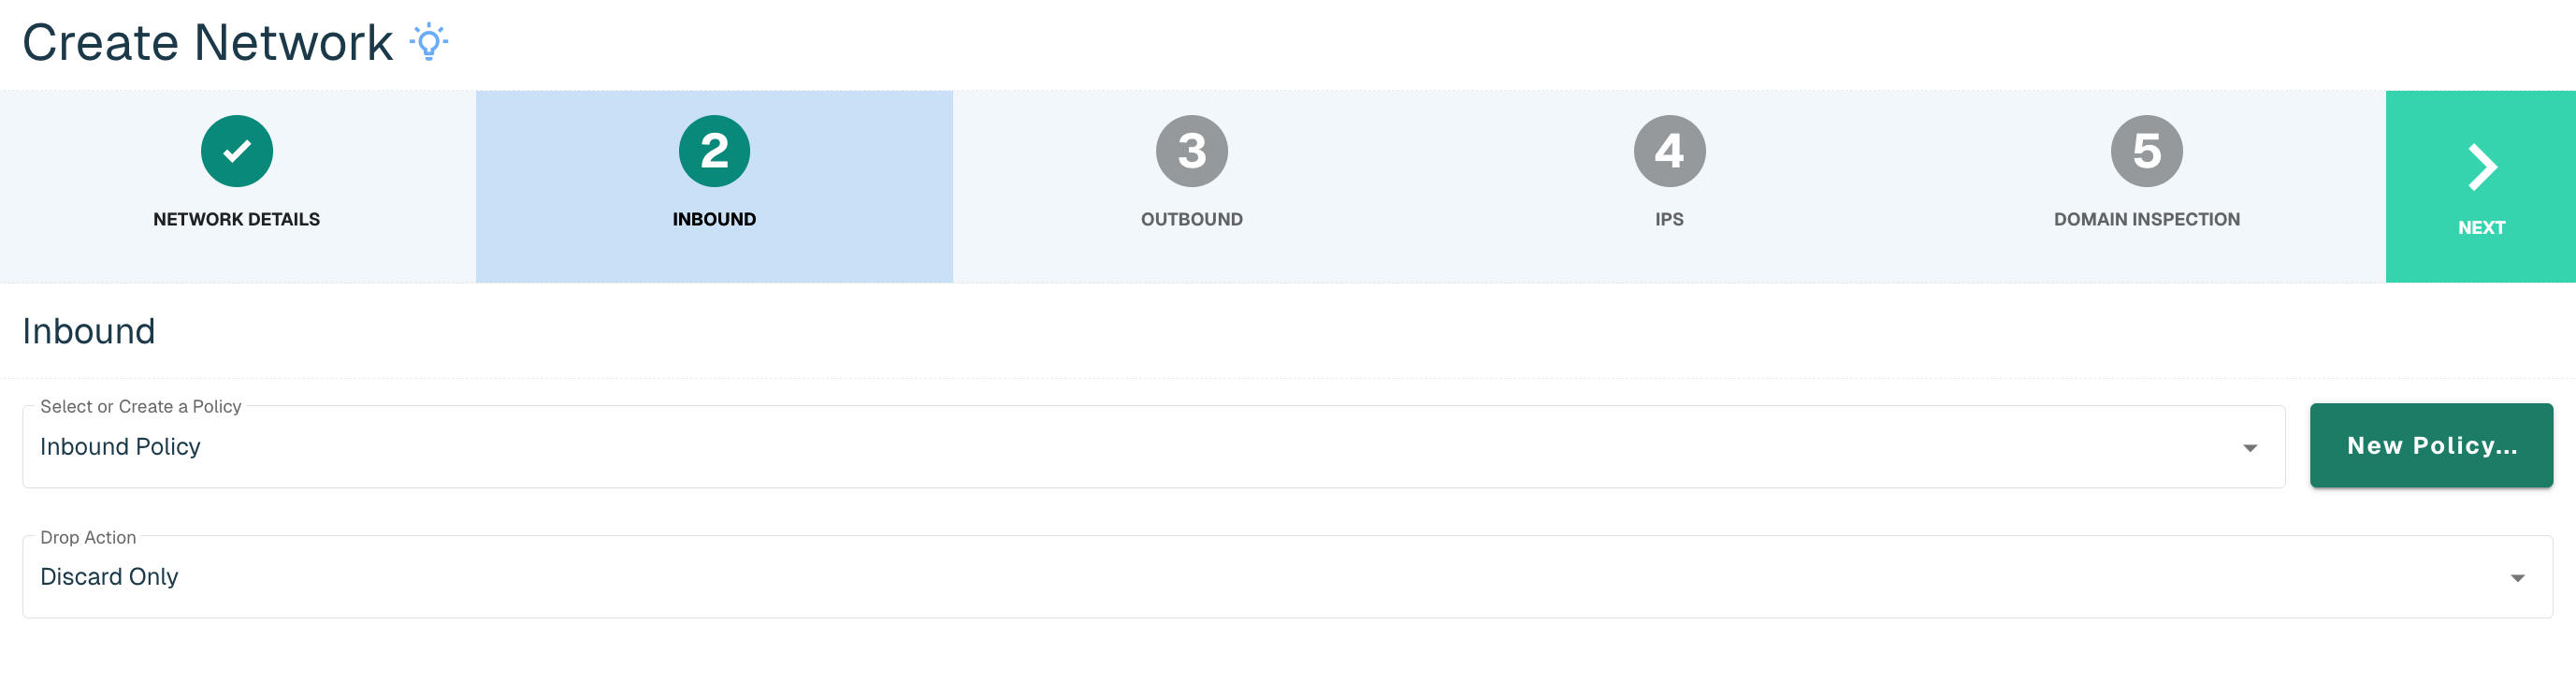
If Both was chosen as the Direction on the Protected Network Details step, the next step will be the same as above, but for the Outbound direction.
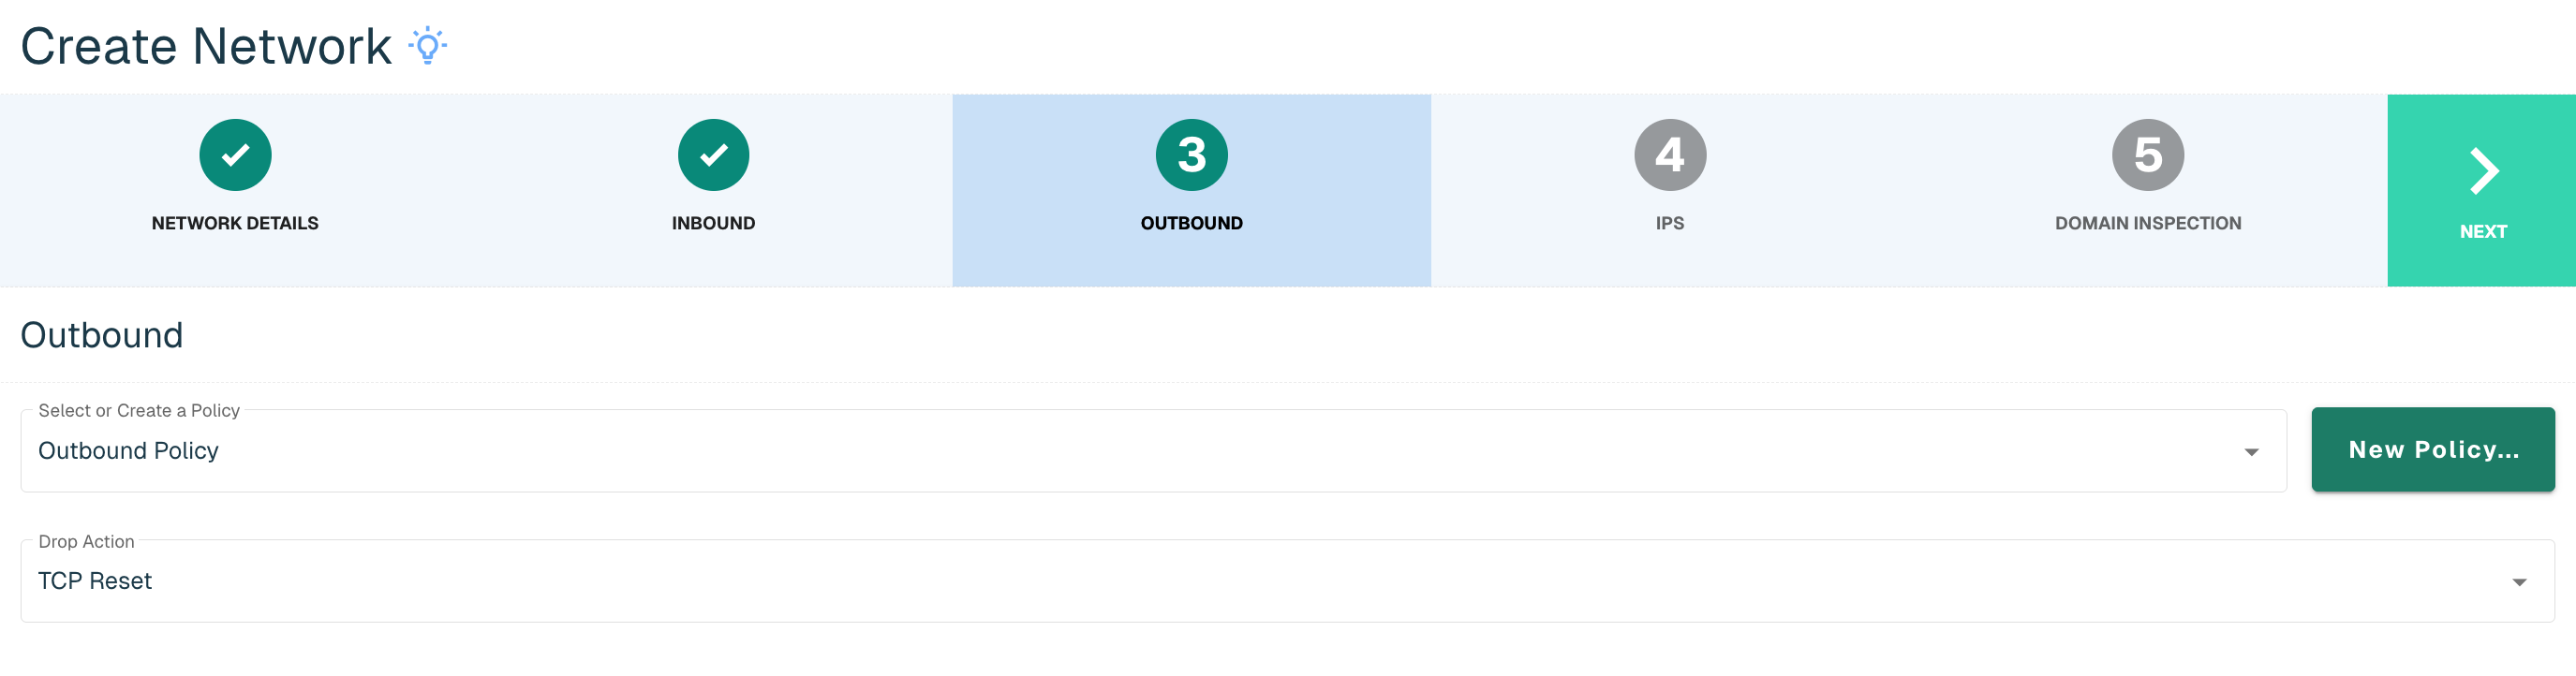
Admins have the option to create a new policy within the Network wizard if a policy does not exist yet to apply to the new Network. Select the New Policy... button on the Inbound or Outbound step and then follow the steps to create a policy, outlined in the Policies section.
IPs
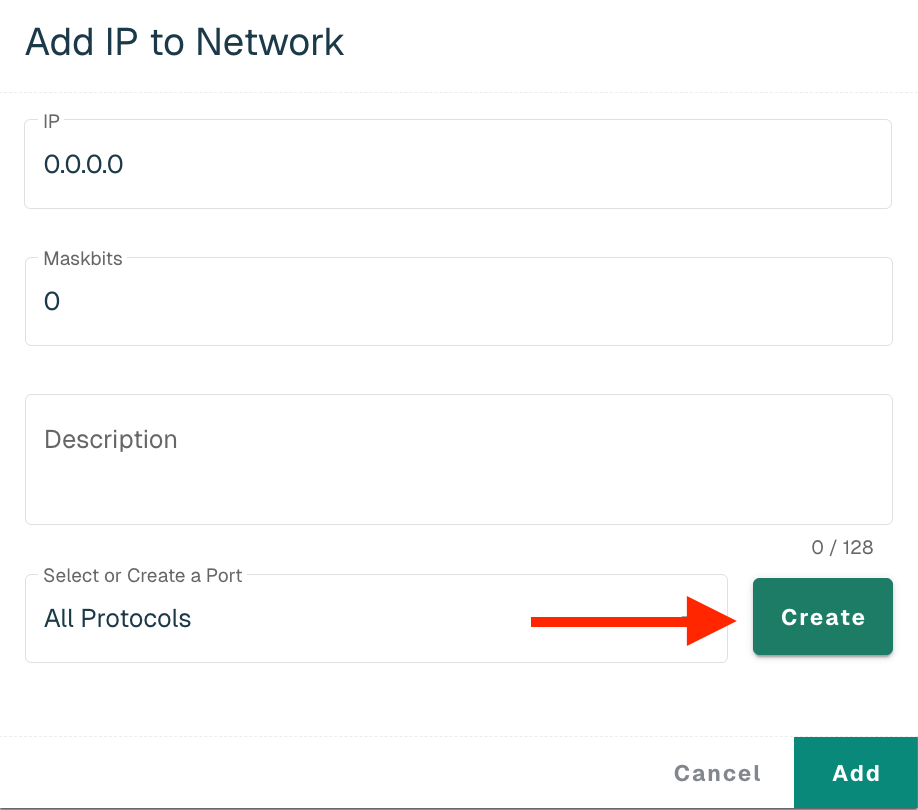
Provide the following to add IPs to your Network (* indicates required field):
|
Field Name |
Description |
|
IP* |
The IP address to be allowed or blocked |
|
Maskbits* |
Subnet mask using CIDR notation (integer ranging from 0 to 32) |
|
Description |
A description of the IP address, e.g. the related URL |
|
Port* |
Options include selecting All Protocols, Previously configured port or create a new Port. All Protocols is the default selection. Click the drop-down to select a previously configure port. |
Click on the Create button to create a new Port.
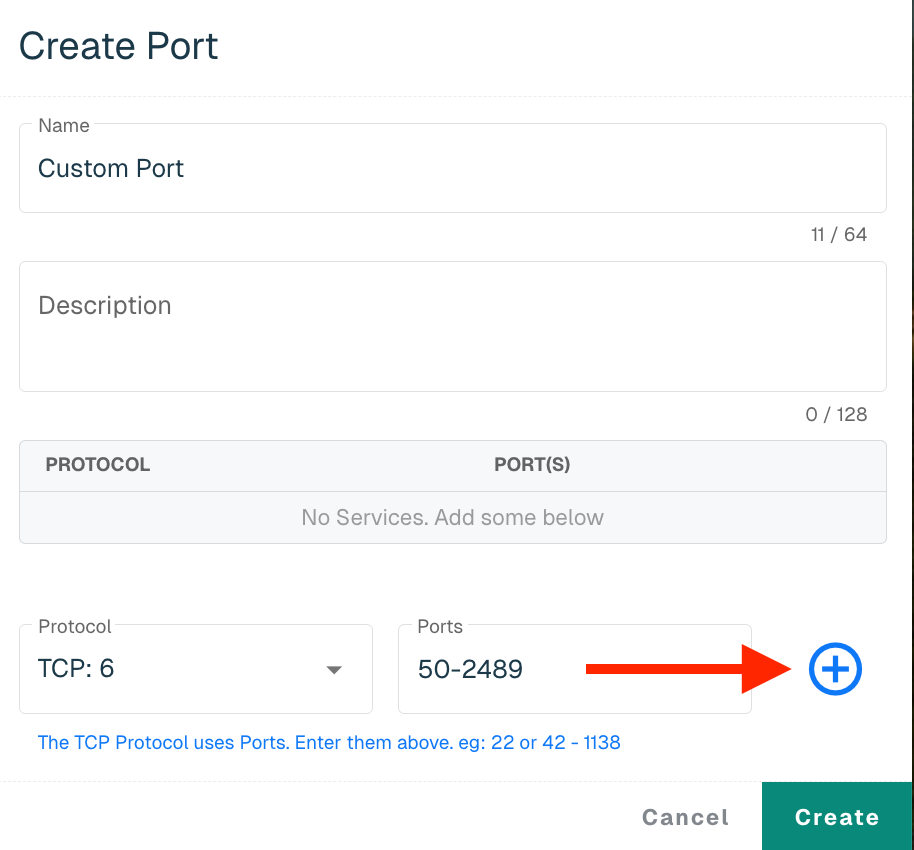
Provide the following (* indicates required field):
|
Field Name |
Description |
|
Name* |
Name of the Port |
|
Description |
A description of the Port |
|
Protocol* |
All Protocols is the default selection, but another protocol can be selected from the drop-down. Some protocols, such as TCP and UDP, require a Port and Port Range. |
Click on the + button to add the Protocol. Any additional Protocols can be included if necessary. Click the Create button to return to the Add IP to Network Panel.
Select the Add button to add the IP to the Protected Network.
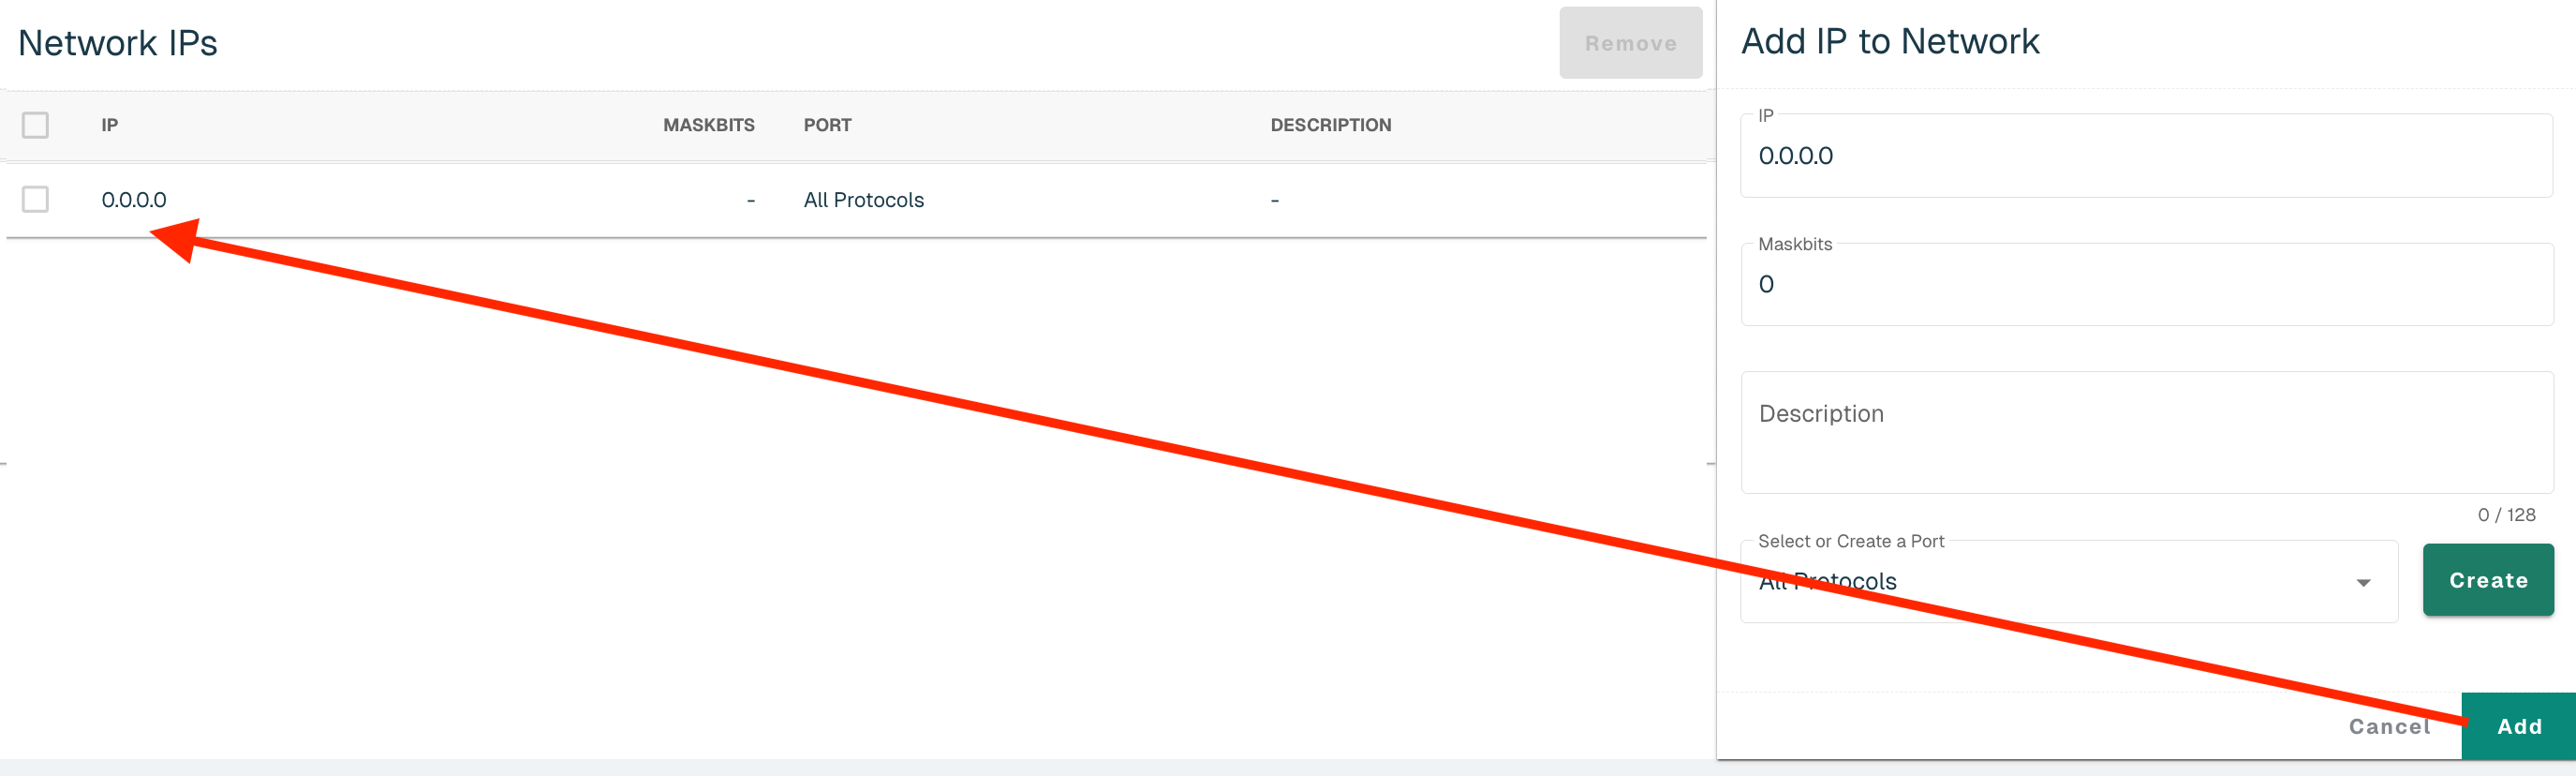
Follow the steps above to add additional IPs. Select Next to proceed to the next step.
Domain Inspection
When Enabled, Enforce will examine connections using the ports specified and attempt to extract domain information from the connection's data. Enforce can currently extract domain information from the Host header in HTTP connections and the SNI header in TLS and QUIC connections.
When domain inspection is disabled (the existing and default state for all networks), domain information is not extracted from connections, meaning they are blocked or allowed based only on the IPs.
Domain inspection does incur a small performance penalty; however, in typical environments it is expected to be negligible. If performance issues are experienced with domain inspection enabled, one of the following actions can be taken:
-
Reduce the amount of traffic being inspected (via inspection ports and/or networks)
-
Upgrade to faster hardware
-
Disabled the feature on the impacted network
Note: It is best to update all Enforcers assigned to the Network to the latest Enforce build for full support of the feature.
Domain Inspection and Control
To enable the feature, toggle the control to the right.
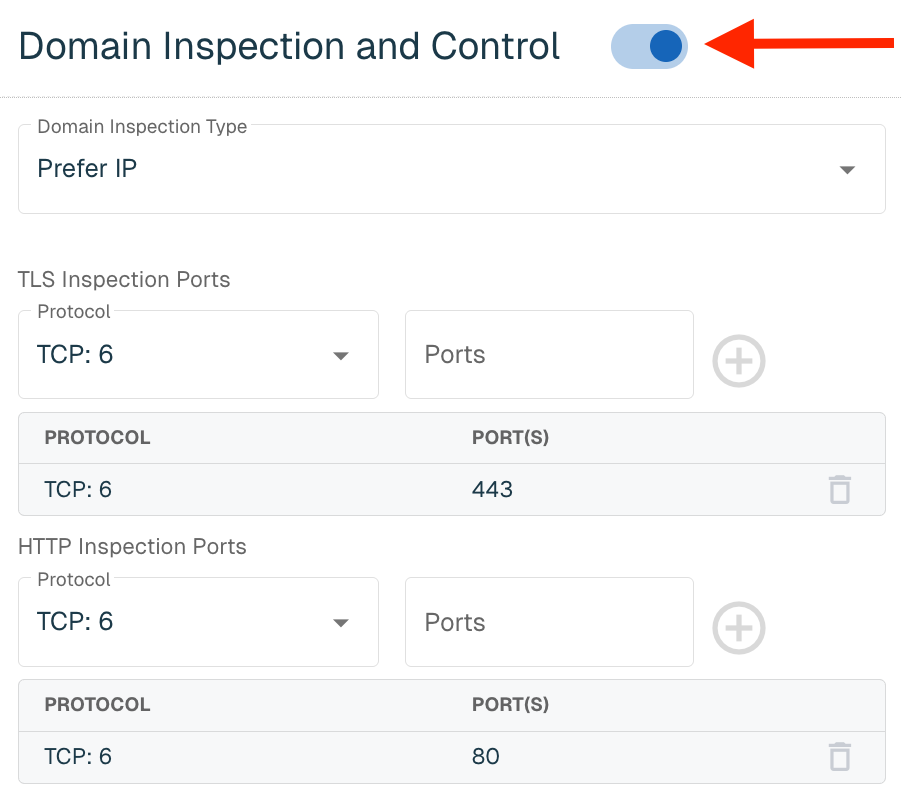
Provide the following:
|
Field Name |
Description |
|
Domain Inspection Type |
Specifies how Enforce uses the IP and Domain policy verdicts to determine if a connection should be allowed or blocked. Select one of the following options from the Domain Inspection Type drop-down:
See below table for more information on domain inspection type |
|
TLS Inspection Ports |
Users can specify the TLS that will be inspected for domain information. For TLS, it is typically TCP port 443. |
|
HTTP Inspection Ports |
Users can specify the HTTP ports that will be inspected for domain information. For HTTP, it is typically TCP port 80. |
The table below shows the action taken by Enforce given the Domain Inspection Type, IP verdict and Domain verdict. If a domain can't be discovered from the connection after 5 packets, the IP verdict is enforced. "Domain None" means the domain was not on an enabled Allow or Block list.
|
Prefer IP |
|
Domain Allow |
Domain Block |
Domain None |
|
IP Allow |
Allow |
Allow |
Allow |
|
|
IP Block |
Block |
Block |
Block |
|
|
|
||||
|
Prefer Domain |
|
Domain Allow |
Domain Block |
Domain None |
|
IP Allow |
Allow |
Block |
Allow |
|
|
IP Block |
Allow |
Block |
Allow |
|
|
|
||||
|
Prefer Both |
|
Domain Allow |
Domain Block |
Domain None |
|
IP Allow |
Allow |
Block |
Allow |
|
|
IP Block |
Block |
Block |
Block |
|
|
|
||||
|
Explicit |
|
Domain Allow |
Domain Block |
Domain None |
|
IP Allow |
Allow |
Block |
Allow |
|
|
IP Block |
Allow |
Block |
Block |
|
Users can delete the default Ports and/or add anything additional. Up to 16 entries can be made for each Inspection Port for a total of 32 entries. Once the settings are made, click the Save button in the top right corner of the screen.
Domain Inspected Connections
When Domain Inspection is enabled, Enforce will need to allow the first few packets for a connection to attempt to extract the domain from the connection data. This is only done for connections to ports specified in the Inspection Ports above.
Even if a connection would be denied by IP, the initial few packets of the connection will be allowed. For example, if an IP would be blocked, but the domain causes it to be allowed, you would see IP logs like this. Note the reason is DOMAIN_INSPECT.

Domain logs will look like the below image:

If the connection ends up being blocked, you'll see logs like the below image:

The connection is initially allowed for domain inspection. Once the domain is extracted and the connection is determined to be blocked, the blocked log is generated.
Domain logs will look like the below image:

Domain Logs
Domain logs have a few additional fields:
|
Field Name |
Description |
|
Type |
This indicates the type of traffic the domain was detected in, i.e. DNS, HTTP, etc. |
|
Verdict Information |
The IP Verdict, Domain Verdict and Domain Inspection Type are included to make it clear why this connection was blocked or allowed |

Authorized DNS Resolvers
Users can add up to 10 authorized DNS server IP addresses that will allow hosts inside the network to make DNS requests. Any requests on UDP port 53 to IPs other than those configured here will be blocked. If no IPs are configured, outbound DNS requests will be filtered according to the Policy applied to the Network (the behavior in Enforce builds 285 and earlier).
To add an authorized resolver, enter the applicable IP and click on the "+" button.
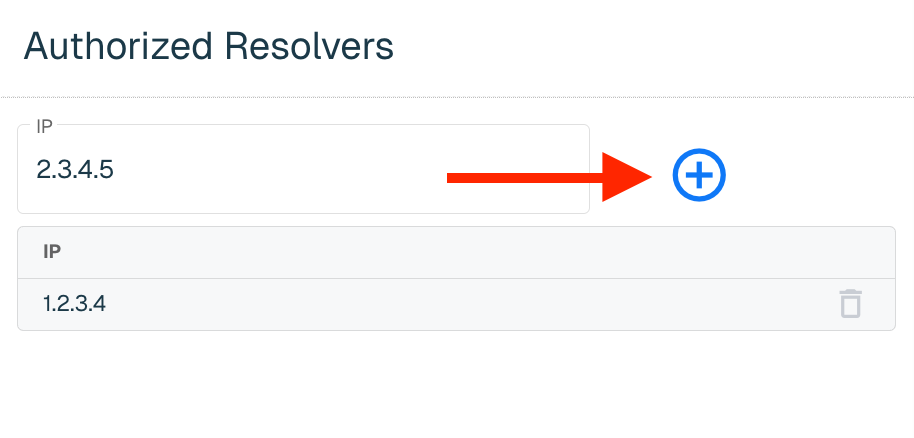
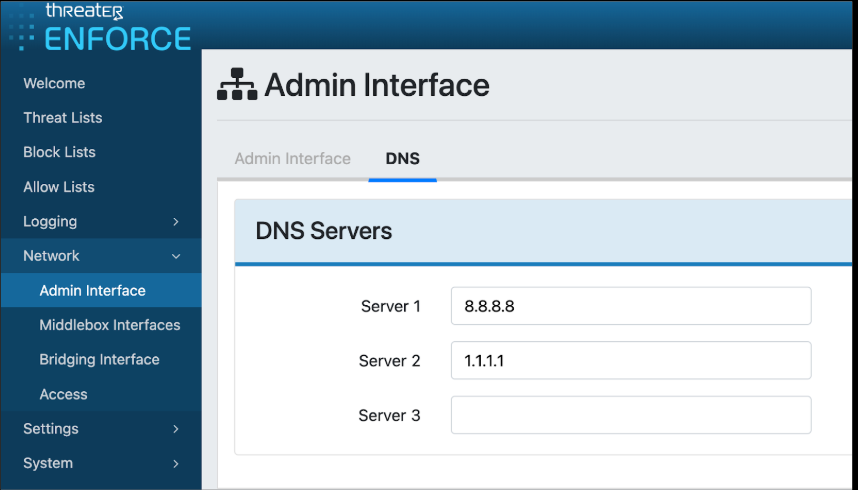
Note: We recommend verifying all Enforcers are using Authorized Resolvers before enabling this feature. Any host using unauthorized resolvers will likely no longer be able to resolve domains. This configuration can be made in the Enforce UI by navigating to Network > Admin Interface > DNS.
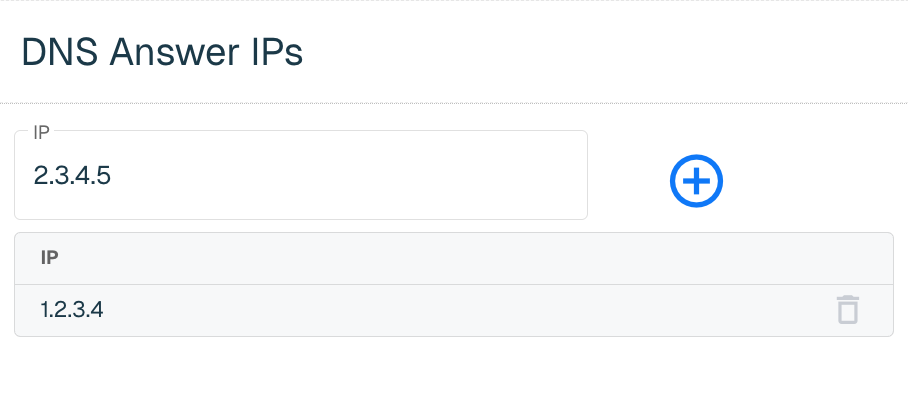
DNS Answer IPs
Users can configure up to 4 IPs that could be returned in the DNS response when a DNS query is blocked. If no IPs are configured an NXDomain response is sent (the behavior in Enforce builds 285 and earlier).
To add IPs, enter the applicable IP and click on the "+" button. Add any additional IPs (up to 4) and then click the Save button in the top right corner.
Select the Create Network button to create the Network once all IPs are added.
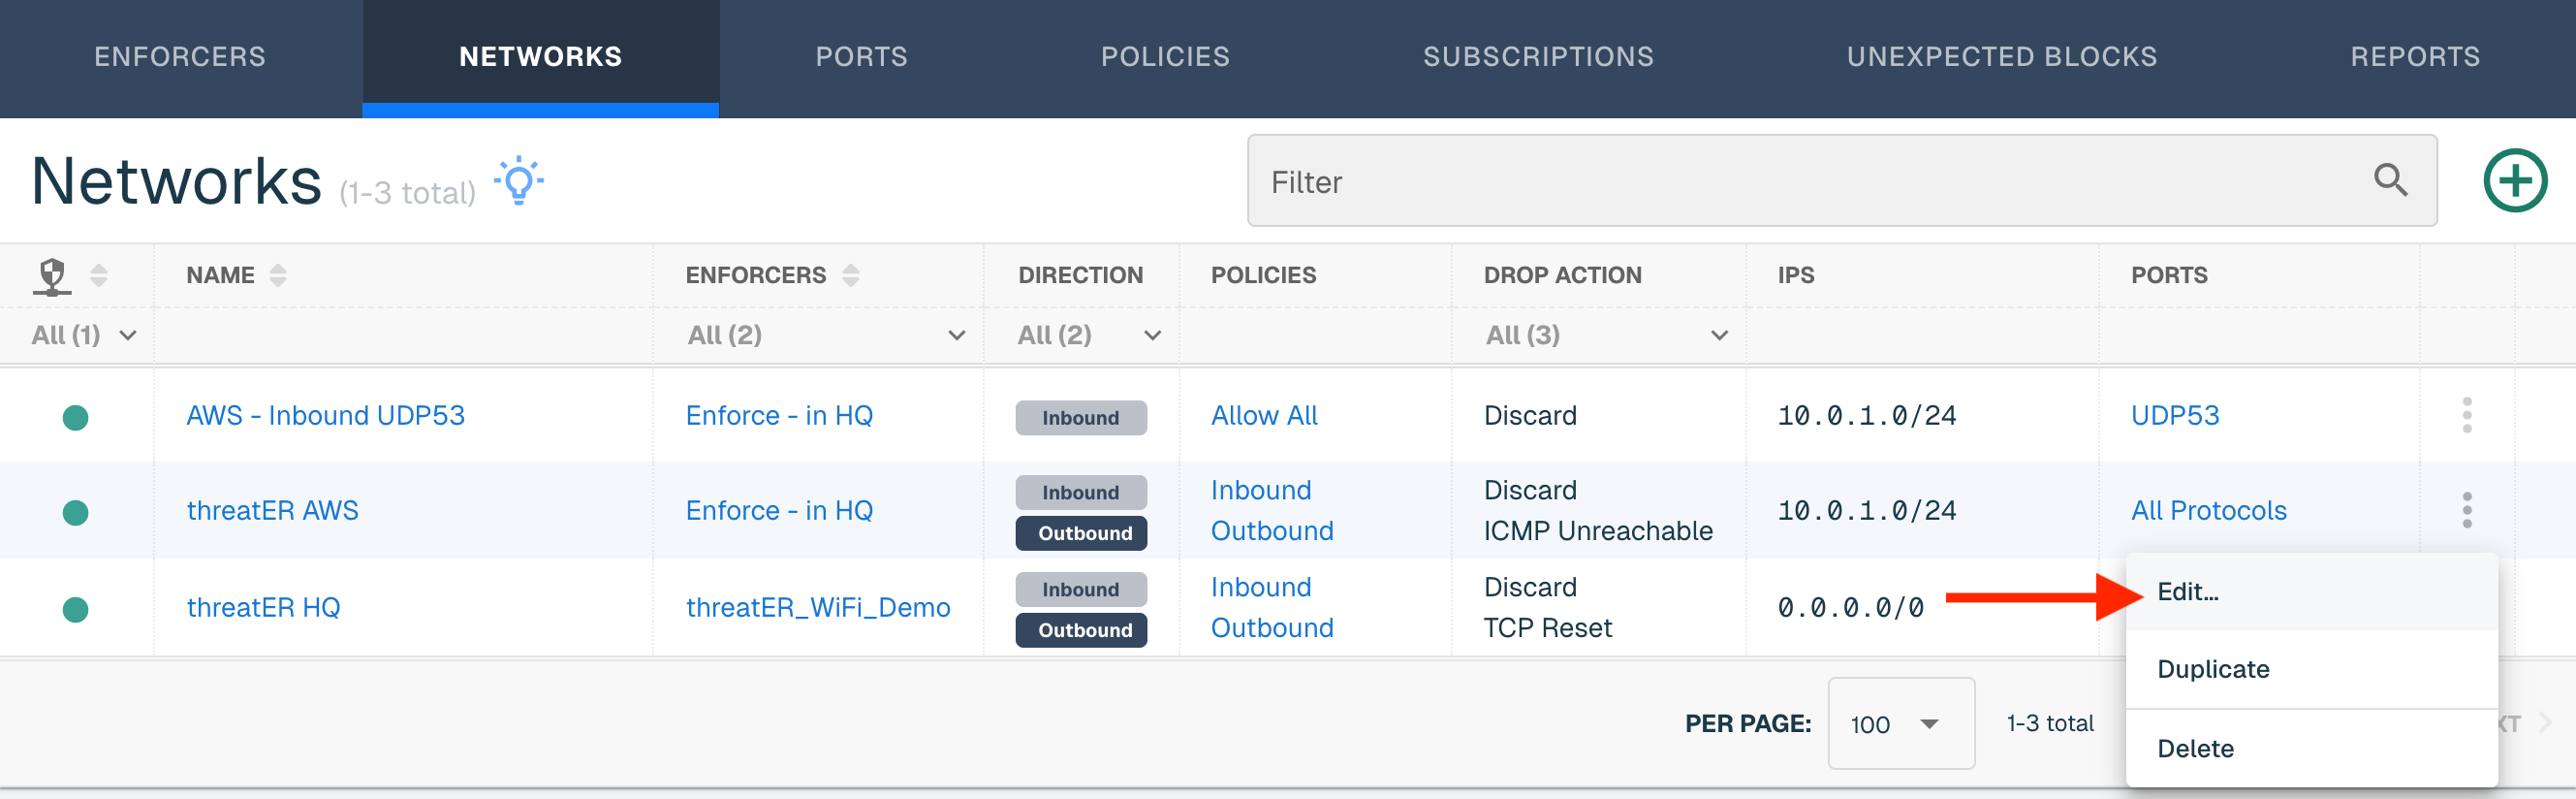
Edit a Network
To edit a Network, find the Network in the table and from the ellipsis menu, select Edit.
The Network Details is the default view when editing a Network. Select Direction(s) Inbound / Outbound to update the Policy and/or Drop Action. Select IPs to add or remove IPs. Refer to the IPs section above for guidance. Click on the Domain Inspection step to extract domain information from the connection data. Refer to the Domain Inspection and Control section above for guidance.
Make any necessary edits and then select another step that requires updates. Select the Save button in the top right corner if edits are only needed on one step.
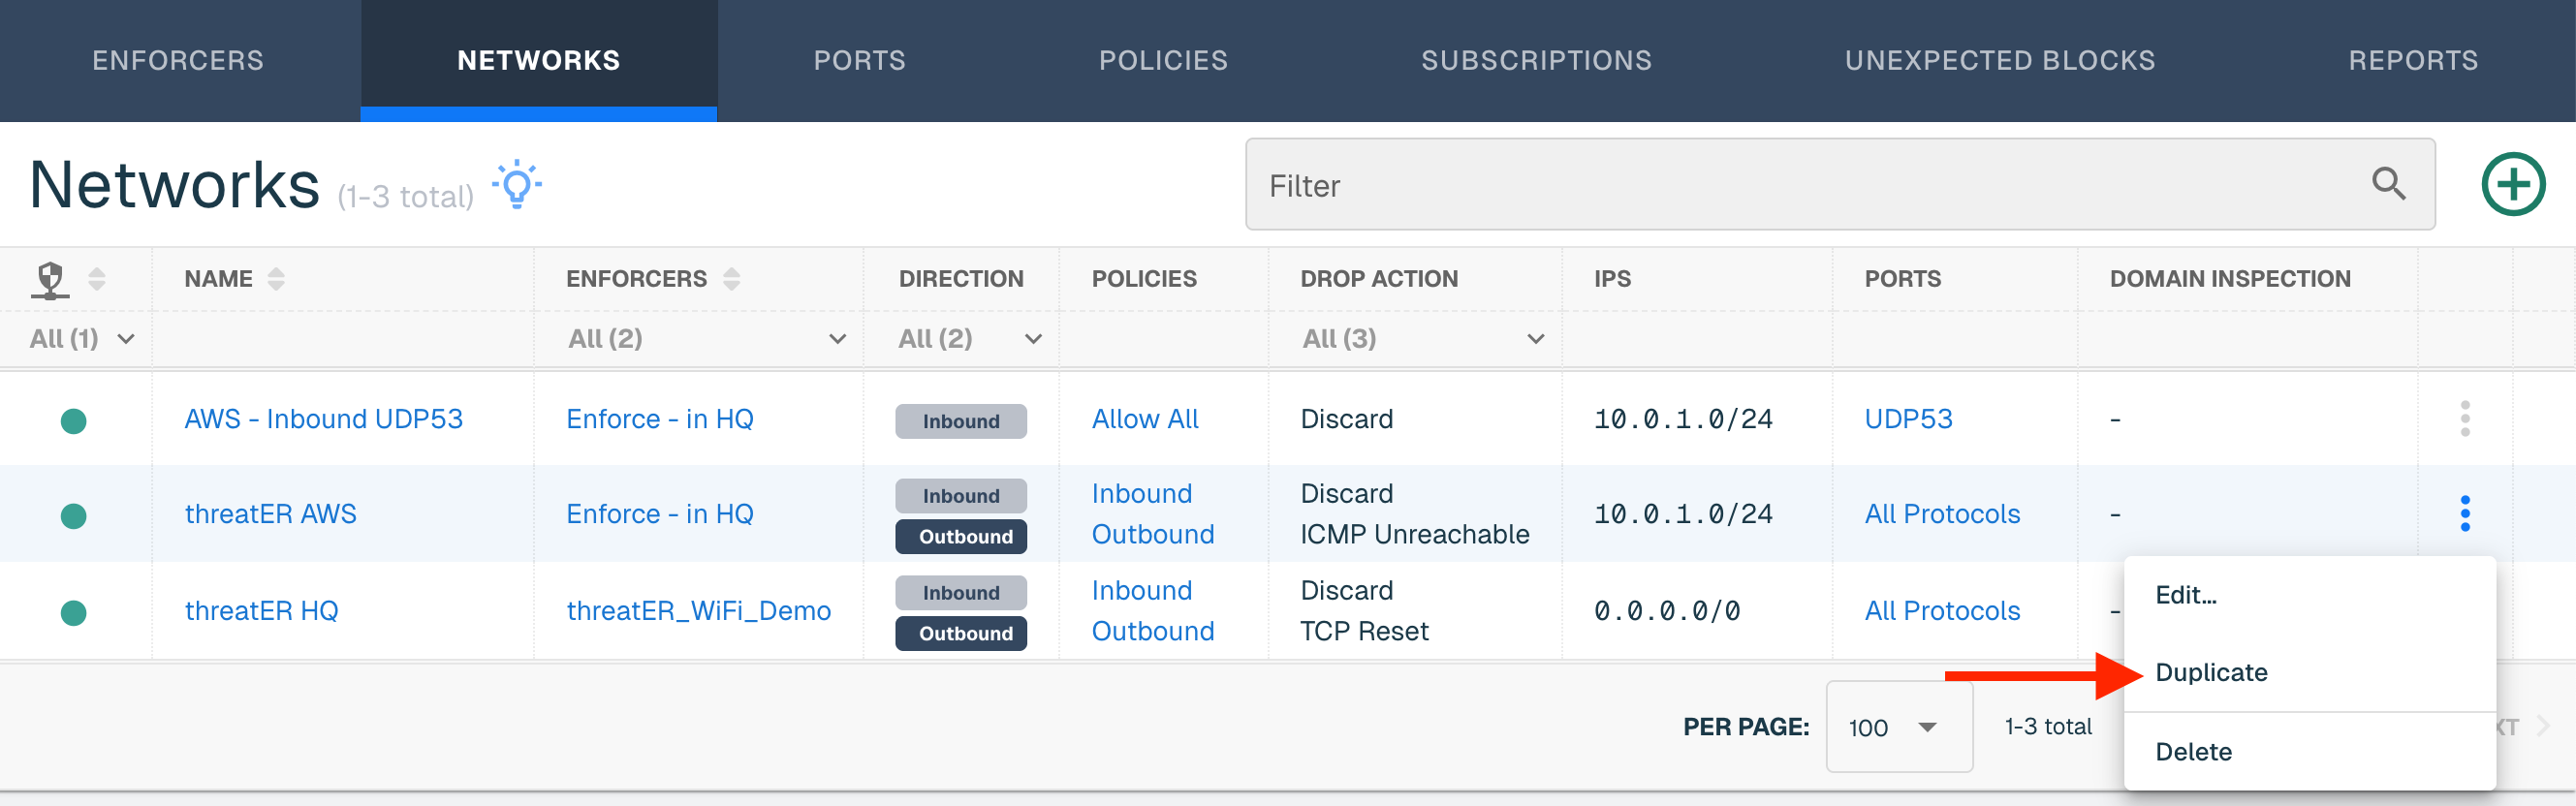
Duplicate a Network
To duplicate an existing network, find the network that you would like to duplicate in the the table. Select Duplicate from the ellipsis in the row of the network.
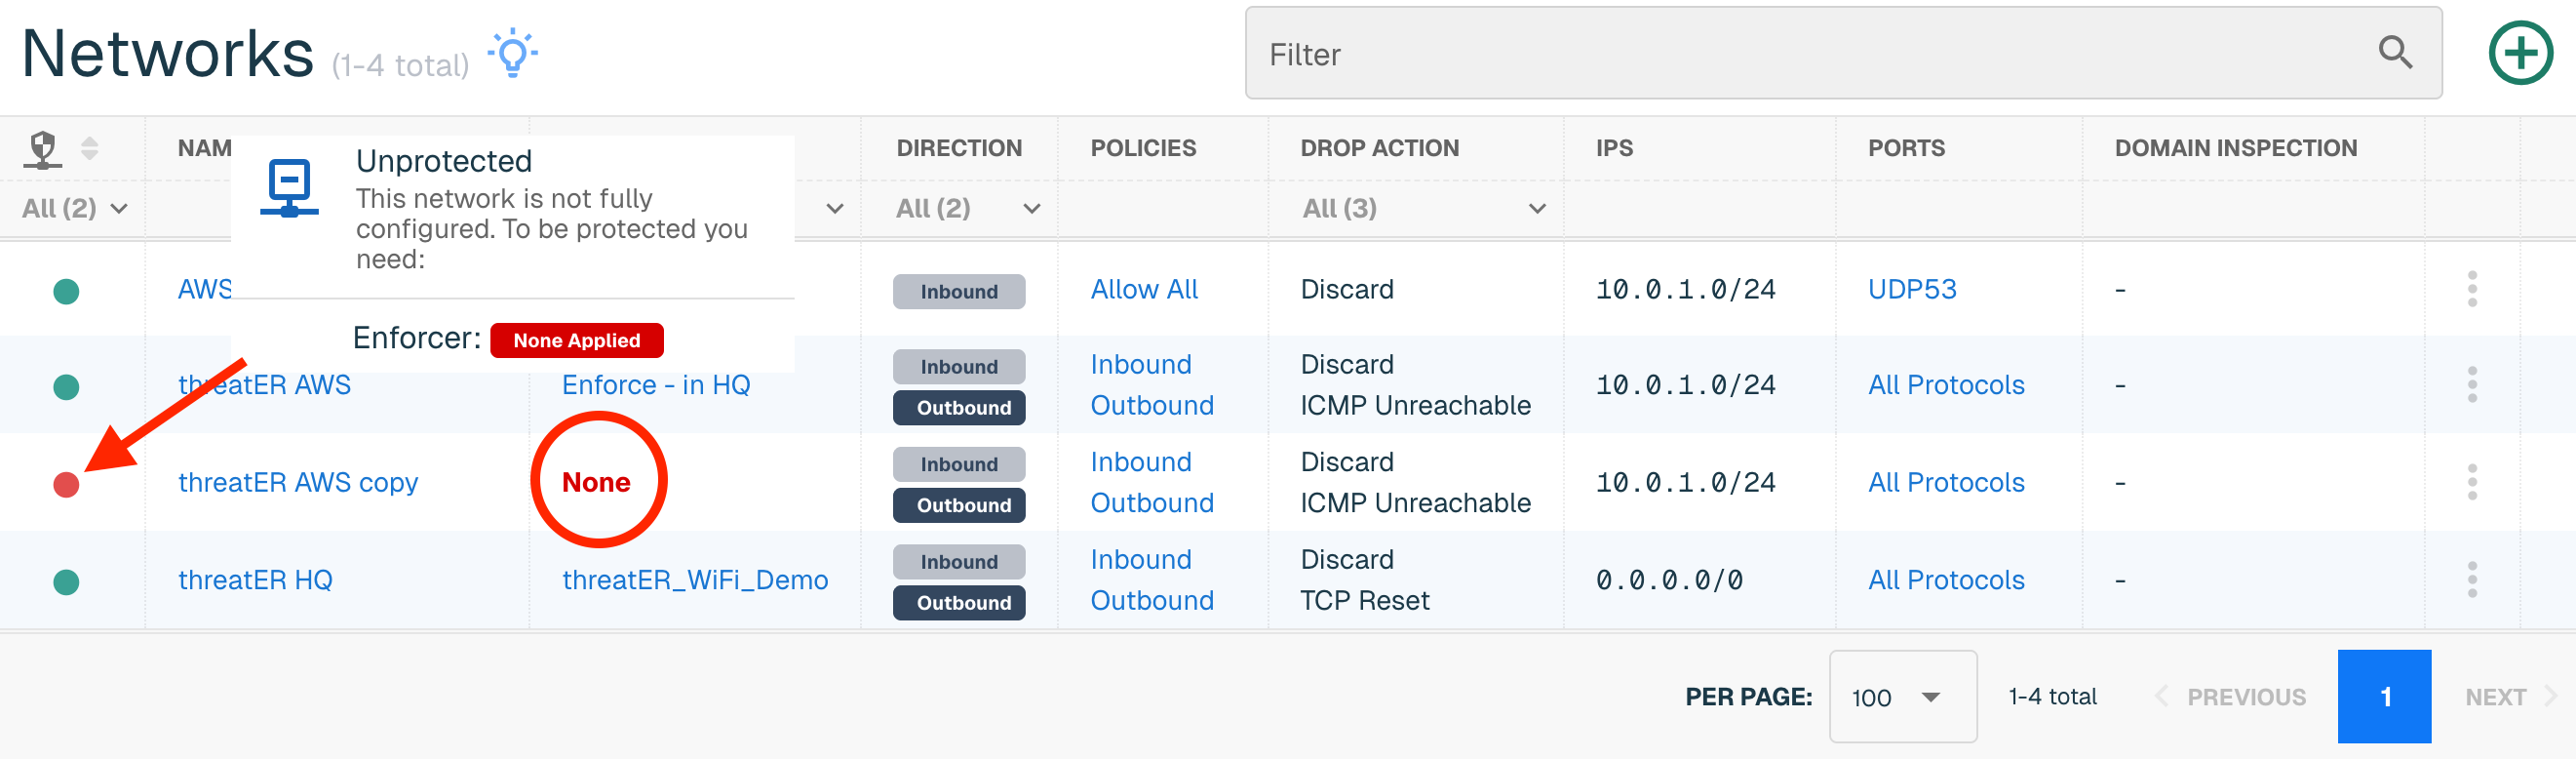
A copy of the network will be created with the word "copy" appended to the network name. The network will not be assigned to any Enforcers until done so by editing the Network and manually applying the Enforcer(s) to the network.
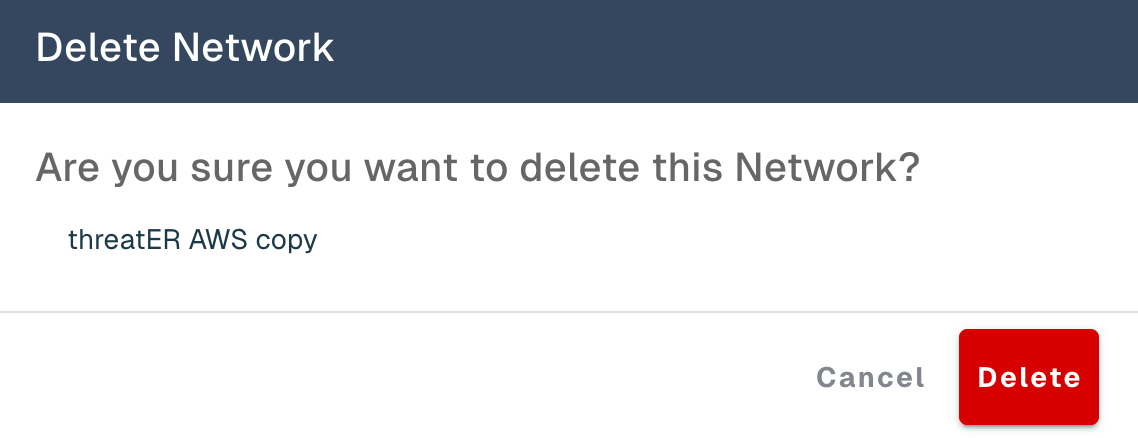
Delete a Network
To delete a Network, find the Network in the table, and select Delete from the ellipsis menu.
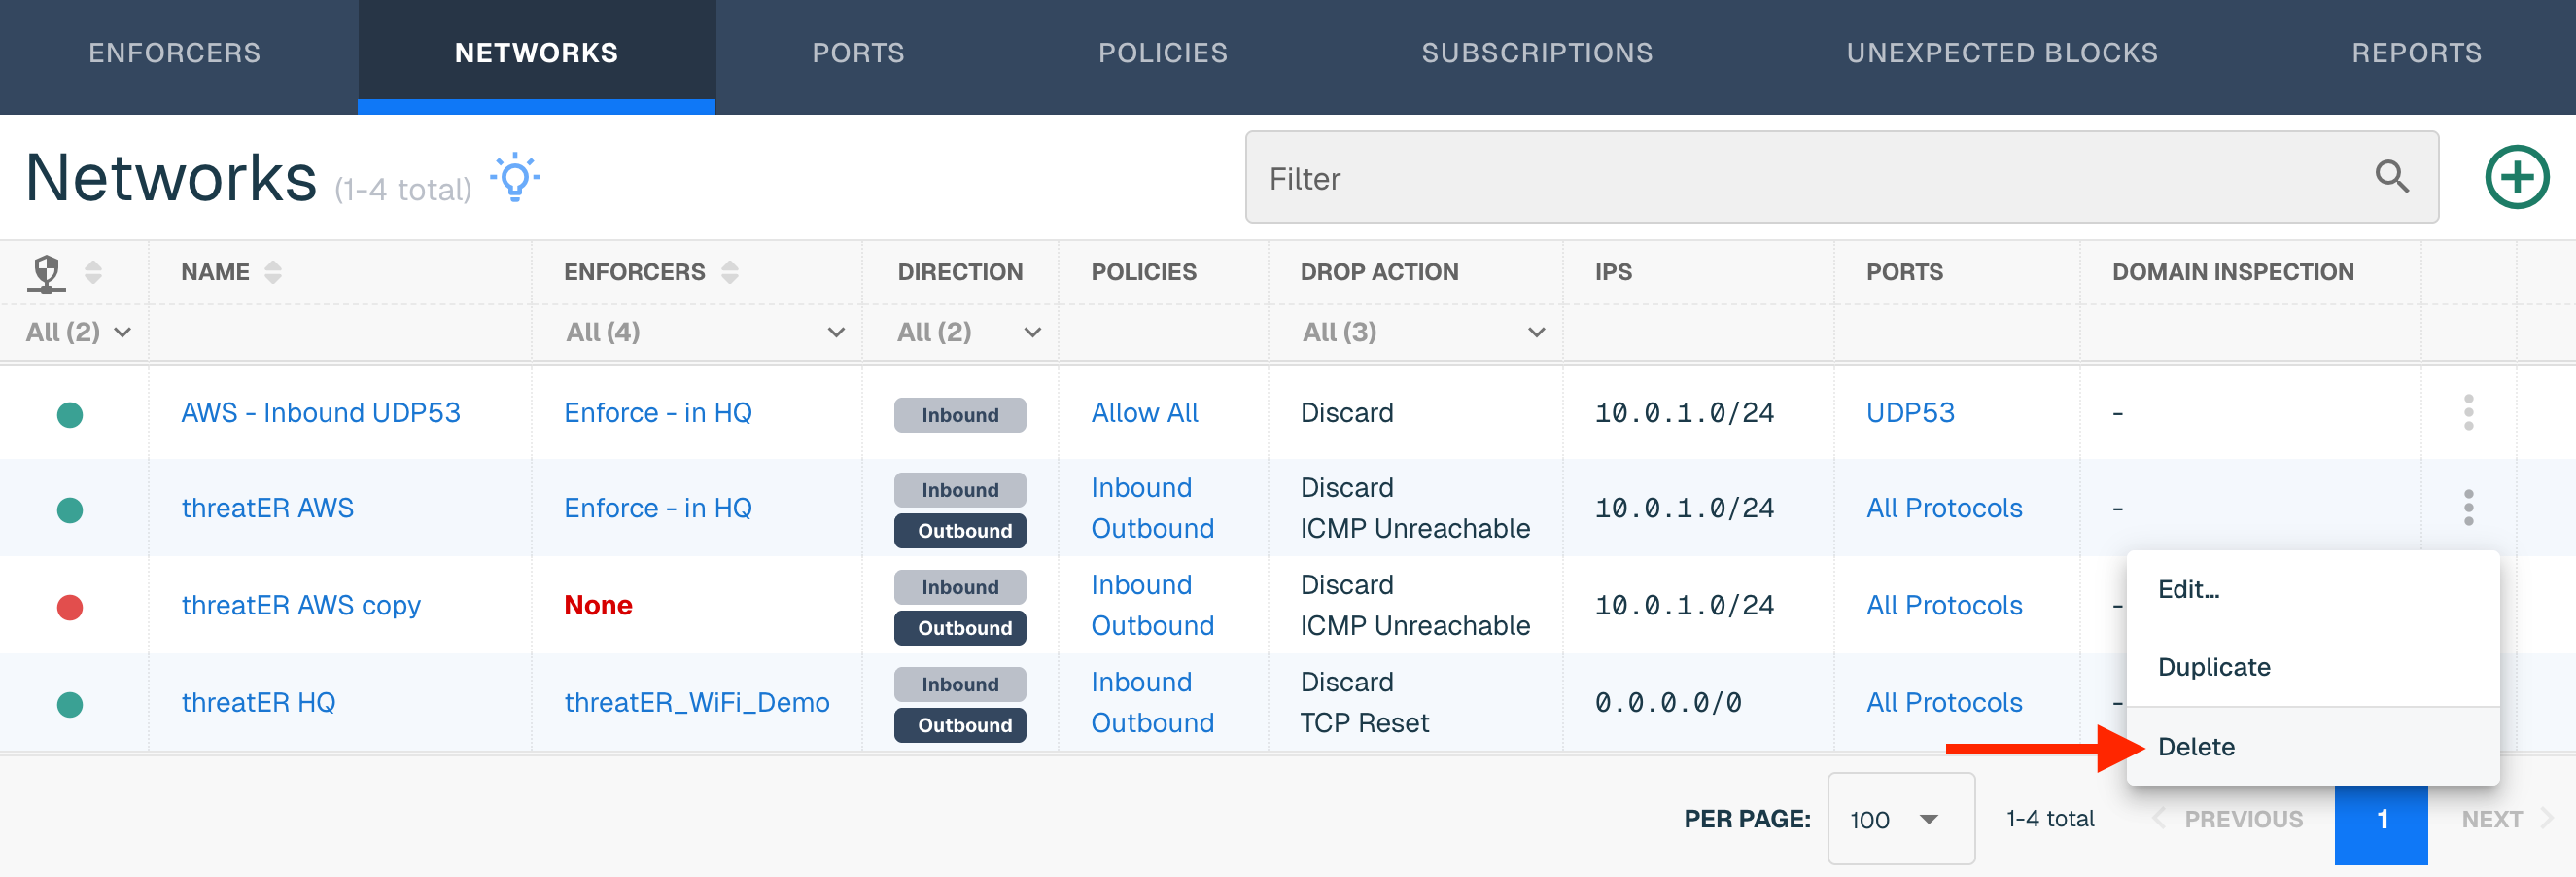
Select Delete on the confirmation modal. The Network is now deleted and can't be retrieved.