
This document provides instructions on how large lists of IP addresses can be added to Allow or Block Lists leveraging our API. The API documentation can be found at the following link - https://portal.threater.com/api/v6/ .
By leveraging the API, we can extend the functionality of the Threater platform to make importing these lists trivial. Customers who have multiple services with broad swaths of IP addresses that need to be allowed will find this most useful, but it can be used by any customer who needs to import any number of IP addresses.
Enabling API Access
To enable API access for your company, log into the Threater portal, go to the Company Profile page, toggle the slider to Allow API Access, and then click Save.

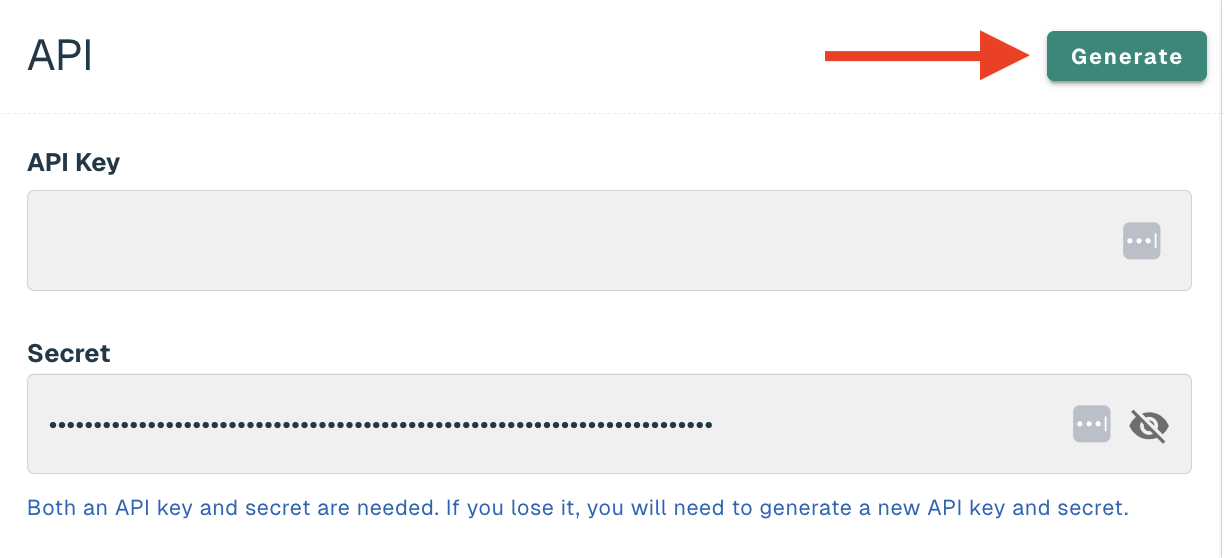
Once API access has been turned on, go to your User profile page, and click Generate API Key. An API key and secret will be generated for your use. Be sure to save this in a secure location as the API secret cannot be retrieved at a later time.
Generating a CSV File
If you’ve read through the API documentation, you may be scratching your head thinking, “Doesn’t the API require JSON?”. If so, you’d be right! The reason we are starting with a CSV file in this documentation is because most of our customers are already using CSV files. However, if you want to start by formatting your IP list in a JSON file we encourage you to do so (skipping this section as well as the converting to JSON section).
CSV files are ubiquitous when it comes to formatting large lists of data. The CSV file for importing IP addresses requires 4 case-sensitive headers:
-
address: the IP address to be allowed or denied
-
maskbits: subnet mask using CIDR notation (integer ranging from 0 to 32)
-
description (optional): a description of the IP address, e.g. the related URL
-
expiresDatetime (optional): date/time the IP address should be removed from the list
Your CSV file should be formatted similarly to the example below:
address,maskbits,description,expiresDatetime
64.4.248.23,32,api.paypal.com,
64.4.249.23,32,api.paypal.com,2025-03-23T00:00:00.000-04:00
66.211.168.91,32,api.paypal.com,2025-03-23T00:00:00.000-04:00
66.211.168.123,32,api.paypal.com,2025-03-23T00:00:00.000-04:00
173.0.84.66,32,api.paypal.com,2025-03-23T00:00:00.000-04:00
173.0.84.98,32,api.paypal.com,
173.0.88.66,32,api.paypal.com,
Note that expiresDatetime is formatted using ISO 8601 with time offsets. The example above shows expiration at midnight Eastern Daylight Time (-04:00).
If you already have a CSV file generated, it should be a simple matter to reformat your headers to match the ones required by the API.
Now that we have the CSV ready, it’s time to get it into a format that can be read by the API.
Converting the CSV File to JSON
The other reason we start with CSV is because if you don’t have a JSON file to start, it’s trivial to convert from CSV to JSON. There are many tools available online to perform the conversion. A couple of examples:
Once you convert the CSV to JSON, it should look similar to example below:
[
{
"address": "64.4.248.23",
"maskbits": 32,
"description": "api.paypal.com",
"expiresDatetime": ""
},
{
"address": "64.4.249.23",
"maskbits": 32,
"description": "api.paypal.com",
"expiresDatetime": "2025-03-24T00:00:00.000-04:00"
},
{
"address": "66.211.168.91",
"maskbits": 32,
"description": "api.paypal.com",
"expiresDatetime": "2025-03-24T00:00:00.000-04:00"
},
{
"address": "66.211.168.123",
"maskbits": 32,
"description": "api.paypal.com",
"expiresDatetime": "2025-03-24T00:00:00.000-04:00"
},
{
"address": "173.0.84.66",
"maskbits": 32,
"description": "api.paypal.com",
"expiresDatetime": "2025-03-24T00:00:00.000-04:00"
},
{
"address": "173.0.84.98",
"maskbits": 32,
"description": "api.paypal.com",
"expiresDatetime": ""
},
{
"address": "173.0.88.66",
"maskbits": 32,
"description": "api.paypal.com",
"expiresDatetime": ""
}
]
With your JSON prepped and ready to go, it’s time to tell Threater to add these to your list!
Leveraging the API
The Threater portal is built with an API-first user interface. Due to this, any action performed manually in the admin console can be performed via the API. This means that any list you generate can be used to populate either Allow or Block Lists depending on your business needs. In this example, we will be using an IP Allow List.
Creating the IP List
To add IP addresses to an Allow or Block List, you will first need to create the list in the portal. Instructions to do so can be found on our helpdesk site here:
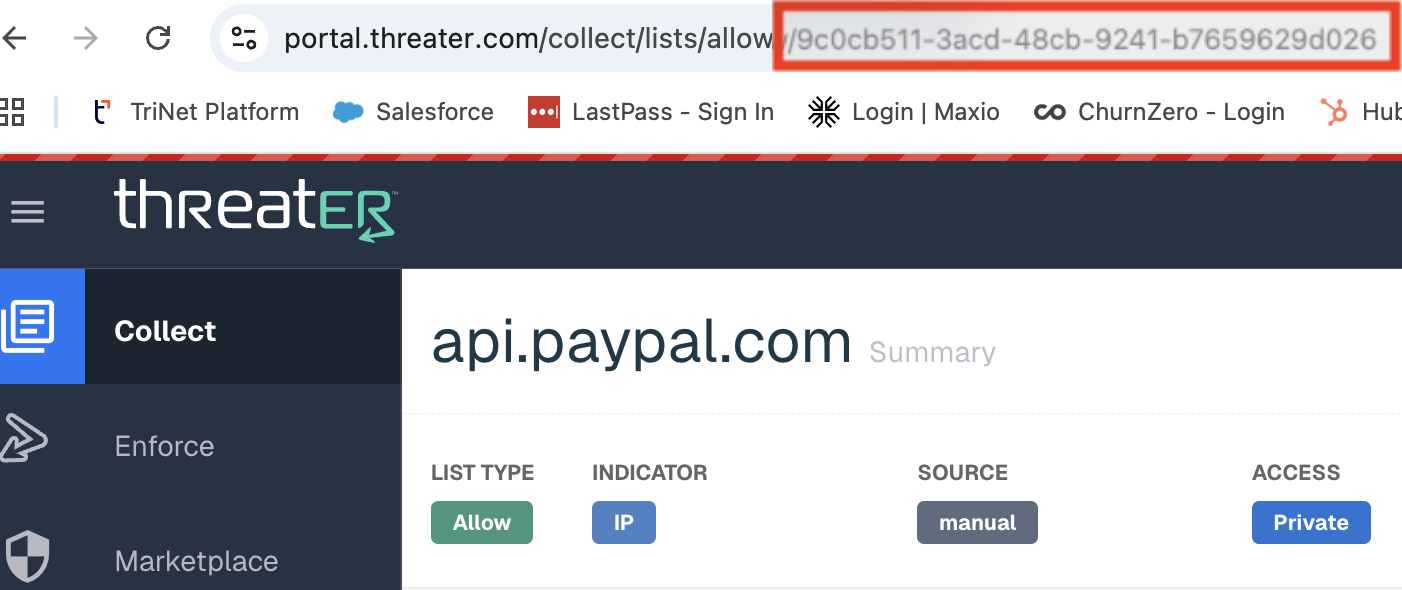
Once you have created the list, make note of the list’s UUID which can be found following the last slash at the end of the URL:
Authorizing the API
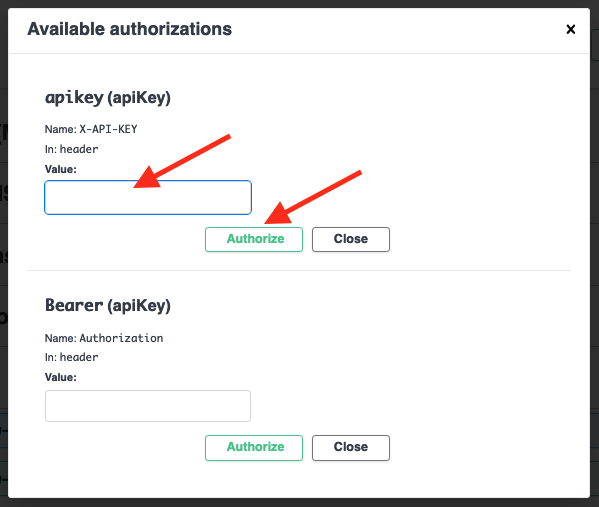
Navigate to https://portal.threater.com/api/v6/ and click on the Authorize button in the top right hand corner. This allows the site to perform the required API calls using the API key and secret generated above.
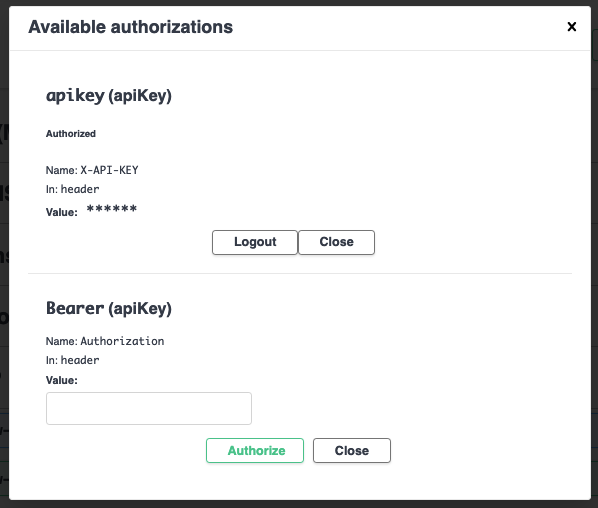
In the modal that appears, enter your API key and secret in the apiKey field. The format for the field is apikey:apisecret (Note the colon separating apikey from apisecret). Click Authorize to complete authorization.
Preparing the API Call
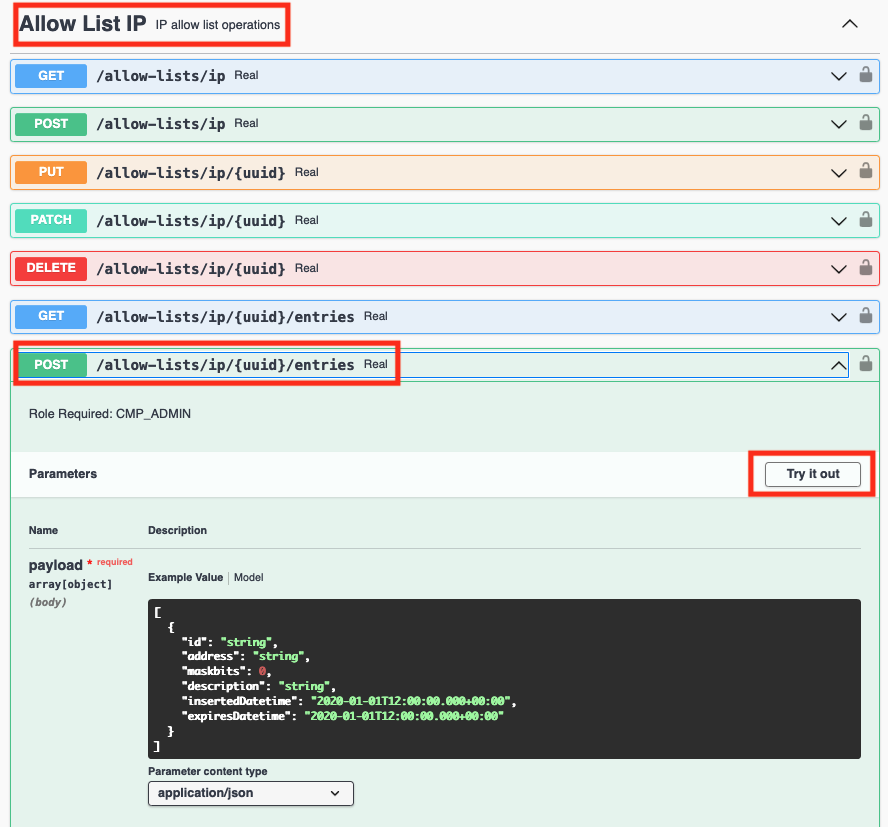
Once authorized, close the modal and navigate to the appropriate API endpoint. In this example, we will navigate to Allow List IP > POST /allow-lists/ip{uuid}/entries. Once there, click the Try it out button allowing you to perform the appropriate API call.
The fields in the panel should become active, and you should be able to edit the values. Copy the JSON you generated above, and paste it into the payload field. Next, copy the List’s UUID noted down earlier, and paste it into the uuid field.
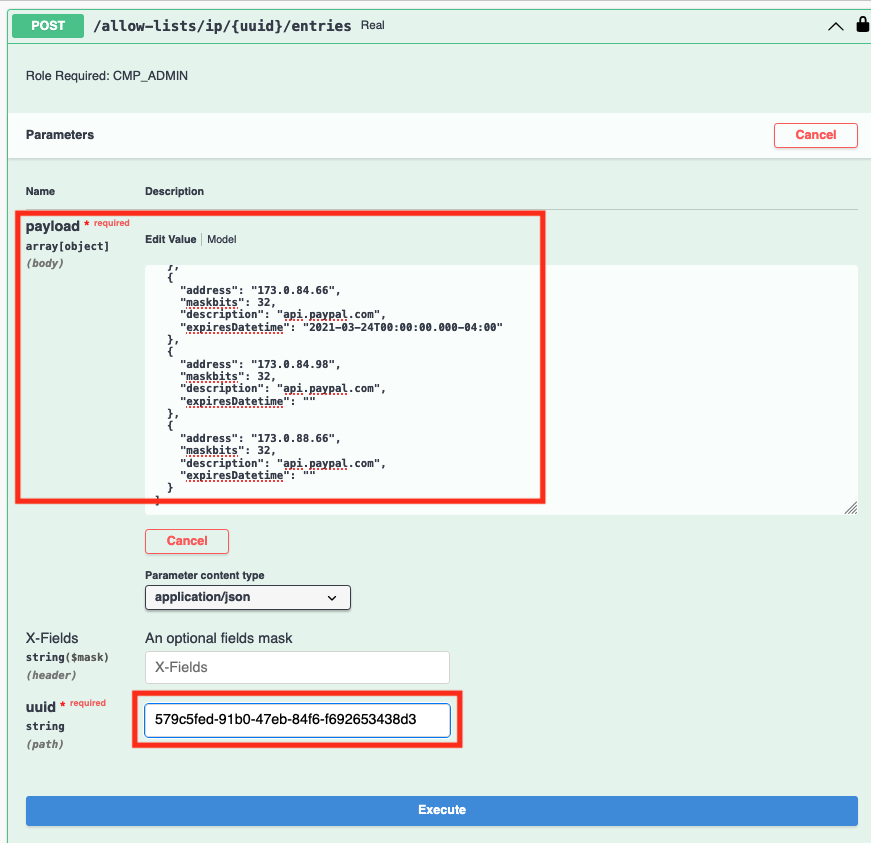
Executing the API Call
Once the information has been entered, click Execute to run the API call, and add the IP addresses to the appropriate List. The Response below should return a 200.

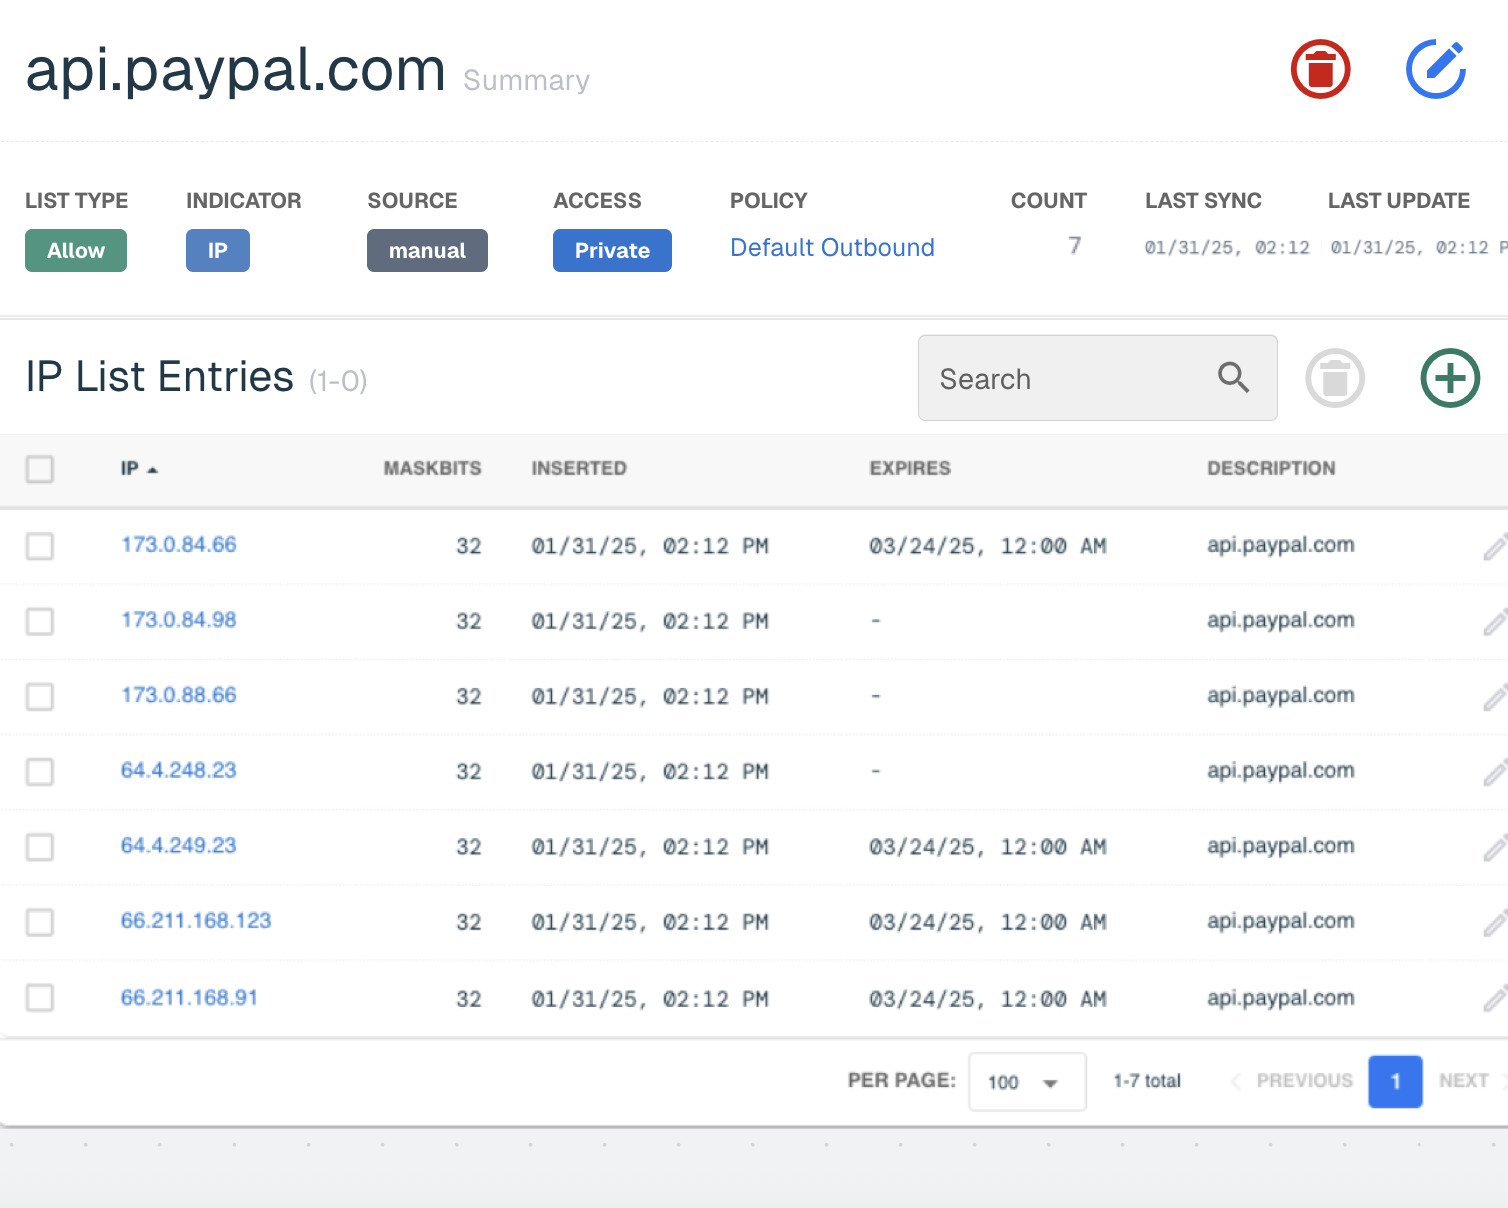
Success
If you were successful, you should now see the IP addresses in your IP Allow List.
Troubleshooting
Did something go wrong? Are you not seeing your IP addresses? If so, reach out to our support team at support@threater.com.